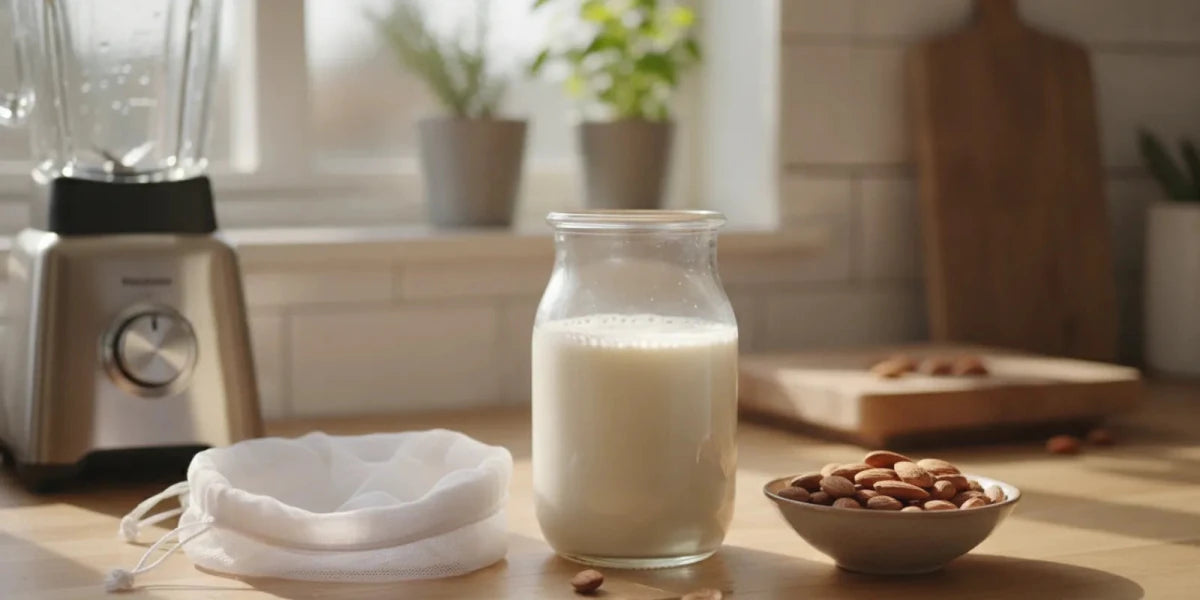
Homemade nut milk is simple to make with nuts, water, a blender, and a fine strainer. A practical first batch uses one cup of almonds to four cups of fresh water: soak the nuts, blend, strain, and refrigerate. Start plain, then adjust the ratio to suit your taste.
What do you need to make homemade nut milk?
For a basic batch, gather raw or unsalted nuts, fresh drinking water, a blender, and a way to strain the mixture. A nut milk bag works well, but a clean fine-weave cloth or fine-mesh strainer can also help. Set a bowl or large measuring cup under the strainer to catch the liquid.
- Nuts: Almonds are a familiar starting point. Cashews, hazelnuts, and pistachios can also be blended, though each has a different flavor and texture.
- Water: Use fresh water for blending, not the water used to soak the nuts.
- Optional flavorings: A pinch of salt, vanilla, or a small amount of sweetener can be added after tasting the plain batch.
- Equipment: A high-speed blender makes the process easier, but a standard blender can work in manageable batches.
Wash your hands, blender jar, straining cloth, and storage container before you begin. A clean, covered container makes it easier to store the finished milk and keep track of what is in it. A little preparation makes the hands-on part smoother: measure the water, set out the strainer, and make room in the refrigerator before blending. If you are using a cloth, make sure it is clean, food-safe, and free of detergent fragrance that could transfer to the drink.
What nut-to-water ratio should beginners use?
One cup of almonds to four cups of water is a useful starting point for a pourable, lightly creamy milk. For a richer result, use less water; for a thinner drink, add water after straining. Nut size, blender strength, and your preference all affect texture, so treat this as a starting formula rather than a fixed rule.
| Nuts | Water | Expected texture | Try it when |
|---|---|---|---|
| 1 cup almonds | 3 cups | Richer and more concentrated | You want a fuller texture for coffee or recipes |
| 1 cup almonds | 4 cups | Balanced and pourable | You are making your first everyday batch |
| 1 cup almonds | 5 cups | Lighter and thinner | You prefer a less creamy drink |
For your first attempt, make the four-cup version and taste it before changing anything. If it seems too strong, stir in water a little at a time. If you want a more pronounced nut flavor next time, reduce the water. Record the amounts that work so you can repeat the result.
Think about how you plan to use the batch before choosing a ratio. For cereal or a glass to drink, the middle option is an easy baseline. For a sauce or oatmeal, a thicker result may suit the recipe better. For a lighter drink, dilute only the portion you are about to use. That keeps the main container consistent and makes it easier to compare later batches.
How should you soak the nuts?
Rinse the nuts, place them in a bowl, and cover them generously with water. Leave room for them to expand. For almonds, an overnight soak of about eight to twelve hours is a practical home-kitchen routine. If soaking for several hours, keep the bowl in the refrigerator rather than leaving it on the counter.
When the soak is finished, pour off the water and rinse the nuts with fresh water. The soaking liquid is not the water you will use for blending. Check the nuts as you drain them; discard any that look spoiled or smell unusual. For another nut variety, follow safe preparation advice for that ingredient.
Cashews are often used without straining because they blend smoothly, but they still benefit from softening. Almonds leave more pulp, so straining is usually part of the process when you want a smooth drink. If you want to try a different nut, make a small batch first rather than changing both the nut and the ratio in a large batch. That gives you a clearer sense of how the flavor and texture differ.
Plan the soak around your schedule. For example, rinse and cover the nuts before bed, then drain them in the morning. If you have less time, make a smaller batch another day rather than guessing at a shortened soak and expecting the same texture. Keep the bowl covered in the refrigerator while it soaks and avoid reusing the soak water.
How do you blend and strain a batch?
- Drain and rinse. Discard the soaking water and rinse the softened nuts.
- Add fresh water. Put the nuts and measured fresh water in the blender. Leave enough room for the liquid to move freely.
- Blend thoroughly. Begin at a lower setting if needed, then blend until the mixture looks evenly cloudy and the nuts are finely broken down. Follow the blender maker's instructions and avoid overfilling.
- Strain slowly. Set a clean nut milk bag or fine strainer over a bowl. Pour the mixture through, let it drain, then gently press the pulp to release more liquid.
- Taste and adjust. Add water for a lighter texture, or a small pinch of salt or preferred flavoring. Blend briefly if you add ingredients.
- Refrigerate. Pour the finished milk into a clean, covered container and place it in the refrigerator promptly.
Do not use a cloth that is not designed for food use. The remaining pulp can be used in some baking or cooking recipes if it has been handled cleanly and kept cold; otherwise, discard it. Its moisture level varies, so a recipe designed for dry almond meal may not work as written with wet pulp.
Pour in stages if your blender jar is small. A crowded jar may not circulate well, and following the maker's fill line helps avoid spills. When straining, let gravity do some of the work before pressing. Pressing too hard can force fine particles through a loose weave and make the milk gritty. If the first pass is still grainy, strain it again through a finer material rather than trying to correct it with extra blending.
Cleanup is part of the process. Rinse the blender and straining bag promptly, before nut pulp dries and clings to the fabric. Wash the container and tools thoroughly, then let reusable cloths dry completely. A tidy routine also helps prevent residue from affecting the taste of your next batch.
How can you adjust taste and texture?
Make the first batch plain. That gives you a baseline and makes it easier to understand the flavor of the nuts. Once you know what you like, adjust one variable at a time: water ratio, nut type, or a flavor addition.
- Too thin: Use less water next time, or blend in a small amount of additional soaked nuts.
- Too thick: Stir in cold water gradually until it pours the way you prefer.
- Grainy: Blend longer, strain through a finer cloth, or press the pulp less firmly to avoid pushing fine particles through.
- Too mild: Use a smaller water ratio or try a more strongly flavored nut.
- Too sweet: Start with less sweetener next time. Add more only after tasting.
Homemade nut milk may separate as it sits. That is expected when ingredients are not held together by a commercial stabilizer. Shake the closed container before pouring. Separation alone does not tell you whether a batch is safe; consider storage time, temperature, smell, and appearance, and discard anything that seems spoiled.
Flavor additions work best in small amounts. Try a pinch of salt in a small cup first, then decide whether to season the full batch. Vanilla or sweetener can also be tested in a serving rather than the whole container. This is useful when other people will drink it, since preferences differ and a plain batch is more flexible for cooking.
Use a simple tasting note if you are experimenting: write down the nut variety, water amount, straining method, and any additions. If a batch tastes flat, change only the ratio on the next try. If the flavor is pleasant but the texture is rough, keep the ratio and refine the straining step. Separating these adjustments makes troubleshooting less frustrating.
How should you store homemade nut milk?
Refrigerate the milk in a clean, covered container as soon as you finish preparing it. Keep it cold and avoid leaving it at room temperature while serving. Make only as much as you expect to use within a few days. Homemade versions do not share one universal shelf life, so do not transfer a packaged beverage's storage instructions to a homemade batch.
Label the container with the date you made it. Before using it, check for unusual odor, visible mold, or another change that suggests spoilage. If in doubt, throw it away; do not taste a questionable batch to decide whether it is safe. Use clean serving utensils and return the container to the refrigerator after pouring.
Freezing can change texture, and not every recipe will thaw smoothly. If you want to test freezing, try a small portion first, leave room in the container for expansion, and thaw it in the refrigerator. Shake or blend after thawing and use promptly.
Choose a container that is easy to clean and has a lid that closes securely. If you make several small portions, label each one with the preparation date so the oldest is used first. Do not pour fresh milk into an older container without washing it. These small habits make it easier to track the batch and reduce avoidable handling.
For readers who prefer not to soak and strain at home, PUR's protein juices and almond nut milks collection is a place to review current packaged options. Check each product page for its ingredients and handling directions.
What allergen and kitchen-safety details matter?
Nuts are a major food allergen for many people. Do not serve a nut-based drink to someone with a nut allergy unless they have confirmed the specific ingredient is safe for them. Almonds and other tree nuts are not interchangeable for allergy decisions. Read labels on anything added to the batch and consider cross-contact from shared blenders, cloths, cutting boards, and storage containers.
If preparing drinks for more than one person, identify the nut used and keep the drink separate from other foods. Clean equipment thoroughly between uses. If you are unsure whether an ingredient or shared kitchen item is suitable for someone, ask that person rather than guessing.
For product-specific ingredients or nutrition, use the current label or PUR's nutrition analysis page; do not assume every product has the same ingredients or serving size. PUR also provides ordering information in its frequently asked questions.
How does homemade nut milk compare with packaged options?
A home batch gives you control over ingredients and thickness. It also takes time for soaking, blending, straining, washing, and storage. A packaged option can be more convenient, but its ingredients, flavor, serving size, and storage directions depend on that specific product. Compare the label and current product information rather than assuming all drinks are alike.
| Consideration | Homemade batch | Packaged option |
|---|---|---|
| Ingredients | You choose the nuts, water, and any additions. | Check the product's ingredient list. |
| Texture | Adjust the ratio and straining to your preference. | Texture is set by the product; check its description. |
| Time and cleanup | Requires preparation, equipment, and cleanup. | Ready to serve; follow package directions. |
| Storage | Keep refrigerated and use within a short period. | Follow the product's current storage instructions. |
To explore other PUR drink formats, browse the juice collection or review kit options. These are different products, so read current details before choosing. Readers considering recurring orders can review subscription information and its current terms.
Convenience can matter as much as control. A homemade batch may suit someone who enjoys the preparation and wants to decide the exact water ratio. A packaged choice may suit a busy day when soaking and cleanup are not practical. Neither route is automatically the right fit for every household. Compare what you will actually use, check the ingredient and storage details, and choose based on your routine.
What are common beginner mistakes?
- Keeping the soaking water: Drain it and blend with fresh water instead.
- Adding too much water at first: Start with a measured ratio, then thin the finished milk if needed.
- Skipping the rinse: Rinse after soaking before blending.
- Overfilling the blender: Work in batches if the jar is small and follow its instructions.
- Expecting a perfectly uniform drink: Homemade mixtures can separate, so shake before serving.
- Making more than you can use: A smaller batch is easier to manage while you learn your preferred routine.
A little note-taking helps. Record the nut type, soak time, water amount, blending time, and whether you strained the batch. Change one detail in the next attempt. If you prefer a creamier result or finer texture, you can then identify what made the difference.
For a first-week plan, keep the experiment modest. Make one small plain batch, note whether you like the texture in a glass and in a recipe, then repeat with one adjustment. If the first batch is too rich, add measured water next time. If it is too thin, reduce the water. If the taste is right but it feels gritty, focus on straining rather than altering the ingredients. A repeatable routine is more useful than chasing a perfect result on the first try.
For more ideas using juices and other ingredients, browse PUR recipes, and use the current all-products collection to compare available formats.
Ask PUR about available options
Frequently asked questions
Can you make nut milk without a nut milk bag?
Yes. A clean fine-mesh strainer or fine-weave cloth can work. The result may contain more pulp or take longer to strain, so pour slowly and use a second pass for a smoother texture.
Do you have to soak almonds?
Soaking softens almonds and can make them easier to blend. It is a useful step for this beginner method. Drain and rinse after soaking, then use fresh water for blending.
Can you make nut milk without sweetener?
Yes. Sweetener is optional. Blend nuts and water first, taste the strained milk, and add flavorings only if you want them.
How do you know if homemade nut milk has spoiled?
Discard it if you see mold, notice an unusual odor, or have any doubt about how it was stored. Keep the batch refrigerated, label the date, and do not taste questionable milk to test it.
Homemade nut milk comes down to a simple routine
Start with one cup of almonds and four cups of fresh water, then soak, rinse, blend, strain, and refrigerate the batch in a clean covered container. Once you have tried the basic method, adjust the ratio and flavor to suit your preferences, while keeping ingredient and allergen details clear.
The University of Georgia's classroom activity about milk types is not food-safety guidance, so this article relies on practical kitchen handling rather than making a safety claim from that source: The Mysterious Milk Experiment Theme.